This is not the typical blog about makeup, hairstyles or fashion. Here I will speak, from my personal experience, of issues related to beauty and health that are not that known. I share my wisdom with the hope that it will help you to avoid complexes, annoyances and money.
Sure! Here’s the full translation of your blog post into English:
Hello everyone!
It’s been a very long time since I last wrote on the blog, but here I am again to share interesting and useful things. This is my latest discovery and, even though it’s a small thing, I’m really excited about it because I had never thought of it before.
I’ve been using solid shampoo for quite a while now because it’s more eco-friendly, practical for travel, and supposedly cheaper, since you’re not paying for a bottle filled with water and a bit of product (as you do with liquid shampoo). You’re paying only for the raw material — the shampoo itself. I say supposedly cheaper because the problem I was having is that when the bar was quite worn down, it was hard to use — not enough lather came out, it would slip from my hands…
I did some research online and found recipes where people cut up the leftover bits of shampoo (or soap), dissolve them in hot water, and make a liquid shampoo. There are also videos where people turn soap flakes into a new bar. I tried the first idea, but it didn’t work — the pieces didn’t dissolve well. Besides, if you do that, it would only be for one-time use, since you’re mixing the product with water and not adding any preservatives like commercial liquid shampoos do. I didn’t try making a new bar, but to do that you need to have enough leftover bits.
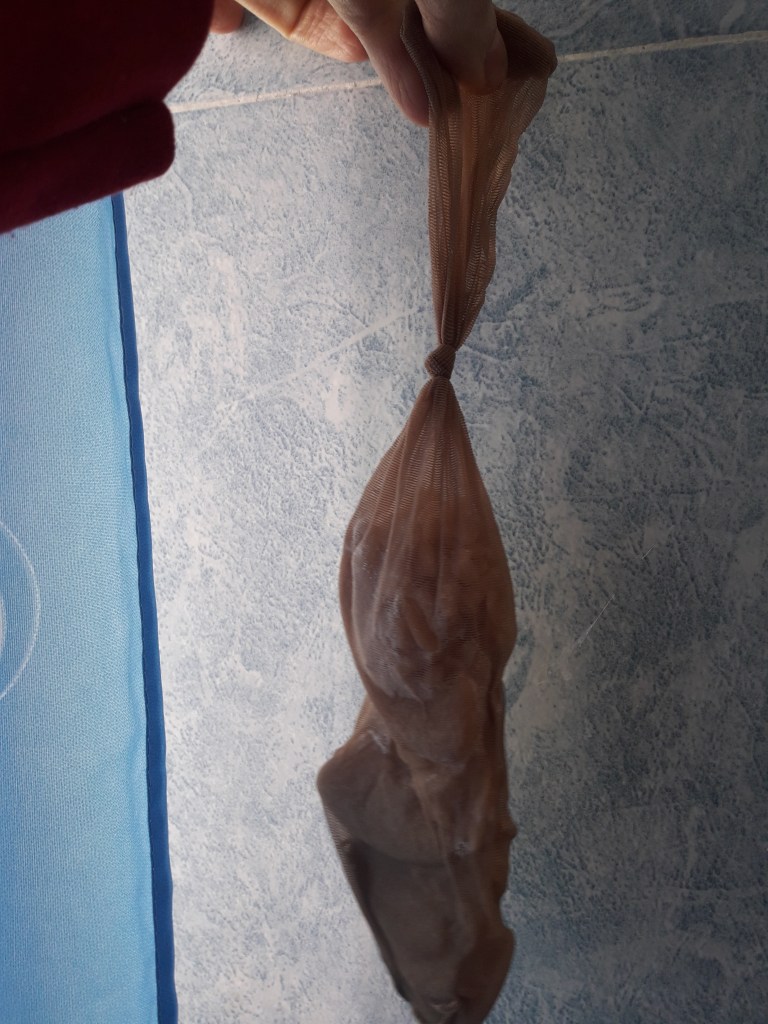
Anyway, the other day I came across a video where a woman said they used to wrap the soap bar (for body use, in this case) in one of those fabric sponges. And that’s when the lightbulb went on! I remembered other videos explaining how you could use an old mesh or stocking to strain nuts for making plant-based milk. And I thought — what if I put the solid shampoo in a stocking to “squeeze” every last bit out of it? Said and done! I cut up an old stocking, put the solid shampoo pieces inside, and tied a knot. When I washed my hair, it worked perfectly — not a single bit of shampoo slipped away, and once mixed with water and rubbed onto the scalp, plenty of lather came out. That way you can use up every last flake. Then you just leave it to dry, and that’s it. When the stocking wears out, you can just wash it normally and use it again. I’m adding a photo of my shampoo-in-a-stocking, already used.
In the last post of this strange year 2020 I want to share that I have written a book!! It is not my first book, but it is the first that I did not write for work reasons and that I’m publishing as Mariahelpsyou. It is available in Spanish and English, both in ebook and paper format. For every taste!
The possibility of self-publishing for free with Amazon had caught my attention a long time ago. Knowing the difficulties of gaining a foothold in the publishing world, it seems like a great option for all those who want to publish something that may not sell, or who are not professional writers. Taking advantage of the low social life imposed this year, I took on the task of compiling some of the blog posts into a book, which has the same title as the blog. It is a short book, with eight chapters, with the posts I thought were the most important to include. In the five years that have passed since I started writing the blog I discovered new things and I had to update several posts. So, in the book I wanted to include all that information together. For example, how I progressed with electrolysis hair removal, belonephobia, skin care, in dyeing my gray hair, in oral care…
The book is aimed especially at teenage girls and girls in their twenties. Every time I wrote a blog post, I mentally relived my past dealing with different beauty / health issues, and each time I thought: “If someone had told me this at the time.” I remembered how I felt so lonely and hopeless with certain problems, which apparently only happened to me because nobody around was talking about them, and that despite my many attempts seemed to have no solution. Some of them (like acne or gingivitis) may seem more common and not as serious. Others, like hirsutism or belonephobia, have really embittered much of my life. That is why the book is aimed at young girls who may living a similar situation. Although it has taken many years, I have found a solution to all these problems. And it has not been thanks to the many specialist doctors, or dentists, or hairdressers, or any so-called “professionals”, but only with my persistence and research on the Internet, losing a lot of time and money along the way. Whoever seeks finds (even if it is later than sooner). Although the book is aimed at young girls, of course anyone can benefit from reading it, at least one chapter, be it a man or a woman of any age.
And well, what better date to launch a book than before Christmas! I do not expect to earn lot of money with this, it would be enough for me to know that the knowledge I share arrived and helped someone who needed it.
Merry Christmas!!
*Where to buy the book:
As an Amazon associate I earn from qualifying purchases.
In this post I am going to talk about a new method that I have been using to cleanse my face. This added to applying only pure aloe vera gel (extracted by me from the plant, as I mentioned in this post) is working very well for my skin.
First of all, I know that what I am going to explain is something similar to the Korean double cleansing ritual. But since I have adapted it in my own way, I have not called it that. Official Korean cleanse includes wiping off the oil with a hot towel and I don’t do that. As always, I seek maximum efficiency with minimum effort, the famous Pareto law. And since I am already using one side of a facial towel (small towel that is only for my face) every night, that’s one facial towel that waits for the washing machine every other night, so I don’t want to also use even more towels to remove the oil from my face.
What I do every night is, always after washing my hands, put 5-8 drops of argan oil on my hands and rub it all over my face, massaging well, insisting where my skin is more greasy (forehead, nose, chin). Oil cleansing is also great for removing makeup, but I don’t normally wear makeup. Then I rinse my face with warm water and apply a few drops of Dr. Bronner’s soap. It is not a soap that dries out the skin because it contains all natural ingredients, although I know that there are people who simply wash with their face with oil and that’s it. But I also like to put a little of this soap. Then I rinse, already with cold water, and gently dry my face with the facial towel. And then I put some cool aloe vera that I have in a glass in the fridge.
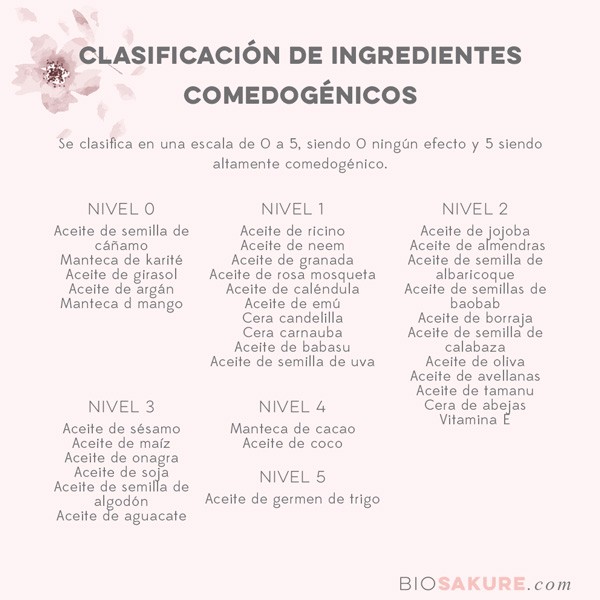
Regarding the oil to use, I use the argan oil because it is not comedogenic and it is the one which bottle I have now opened. When it is used up, I will use one of jojoba oil that I have unopened. Many also use olive oil, coconut oil…It all depends on whether you have oily or acne-prone skin, in that case you should look for non-comedogenic oil. If you don’t have this problem, any oil will work.. Anyway, as you rinse and wash your face with soap afterwards, it is difficult for oil to clog pores on the skin, it is not the same as using it as a moisturizer. Rather, what is sought with this method is: 1) a good cleaning, 2) avoid drying the skin when applying the soap or cleanser (since the oil creates a protective film on the skin). There are people who even apply oil to the body before showering so that their skin does not dry out with the lime from the water or due to soap, and the same to the scalp before washing their hair (I also do this, with coconut oil, and my head no longer itches, which sometimes happened to me before). Having a limescale/chlorine filter in the shower also helps with skin and itchiness.
That’s it for today, until next time!
*To buy the products I speak about (I only recommend products that I’ve tested):
As an Amazon Associate I earn from qualifying purchases
In this month’s post, I am going to talk about a product that, at least until a few months ago, was unknown to me: Retin-A (as they call it in Latin America) or Retirides (known by this name in Spain). If you read my post about acne and Roacután, you will know that I strongly defend its use to defeat acne for good, despite the urban legends and horror stories that some people tell about. I defend it because it went well for me and for all the people I know personally and who had this treatment well, and it’s been like that until today. That said and taking into account that I had this treatment 13 years ago, I have to say that occasionally I have a pimple mainly due to my period, but nothing worrisome. It helps that I am very careful with the products I put on my skin and very scrupulous with hygiene (I never touch my face, I use towels that are exclusive for my face, I change the pillowcase often, I use little and mineral makeup, aloe vera …) . I also take great care of my diet, this and the changes I have made over the years are something that I will talk about in another post.
But getting to the point, in November of last year, I suddenly got one of those horrible-big-painful-pimples with pus in the middle of my face. For me there are serious and non-serious places where you can get a pimple, and in the face, that is, the cheeks, is the worst place. It is the worst place because that is where the serious-cystic-the kind that leaves marks acne occurs. So obviously I panicked, because it hadn’t happened to me in over a decade. Yes, I had the typical pimples in the T zone (forehead-nose-chin) and impurities in my neckline, which is also oily, but not those type of pimples. What I did was wait for the pimple to fully develop, and it took almost 3 weeks!! I tried not to rub it when washing my face, to sleep on the opposite side of my face so as not to spread bacteria, obviously not to put on makeup there…When it had grown up, I put some iodine on it, because I heard that you shouldn’t put alcohol on it, but then I heard the opposite, that you shouldn’t put iodine on it… It ended up disappearing, but left a round red mark, and I didn’t exploit it or anything. To this day you can hardly see it, but that confirms my theory that there are harmless pimples and mass destruction pimples of mass destruction (like that one).
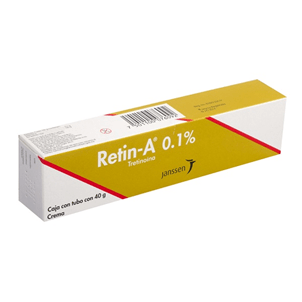
Apart from the food issues that I will address in another post, I began to investigate what could I do, because at the cosmetic-hygiene level I already considered that I did everything well. And that’s where I discovered Retin-A or Retirides. It is an ointment with the same active ingredient as Roacutan (tretinoin) that occurs in concentrations of 0.025%, 0.050% and 0.1%. I saw some videos and blogs that talked about it (the most scientific one: Cómo se aplica el Retirides), and I decided to try it.
The good thing about being an ointment is that it does not pass through the liver or have as much risk to health as Roacután, but obviously its effectiveness is lower and slower. It would be like a light version of Roacután. Doctors recommend starting with the lowest concentration and going up, because it is a strong ingredient and reactions on the skin may occur (redness, skin peeling… I bought it after the horrible pimple because another one came out right next to it, confirming my other theory that bacteria in pimples move… In analogy with what happens now with the virus of the moment, if a mass destruction pimple comes out, you have to take serious measures as soon as possible to prevent it from spreading. And since I only wanted the ointment for that, because I was not willing to buy a bottle of 0.025% or 0.050%, spend it (which could take me months or years, since the recommendation is to apply a very small quantity and only twice a week) and then buy another one with 0.1% concentration. Also, it seems to me that there is quite a difference between the concentration of the first two and the third one. So, I started buying the 0.1%, the maximum concentration. As happens when having Roacután, this ointment can cause the area where you put it to peel (but not your lips constantly or as heavy as it happens with Roacutan), and it causes your skin very sensitive to sun (I have no problem with this because I am very careful, although in my daily routine I do not use sunscreen (normally).
In my case, when I applied it, my skin itched a little, but nothing else. It should always be applied at night and with dry skin. And well, the start of massive destruction on my cheek luckily stopped, applying the ointment to the area twice a week. On the rest of the face I did not dare to put it on, because it is supposed to have the same effect as Roacutan: multiply by 6 the rate at which the skin is renewed and “bring out” hidden comedones. I had no intention of seeing what would happen because the rest of my face is fine so I didn’t want to risk it. I say this because Retin-A is also used a lot to eliminate spots and as an anti-wrinkles ointment: many people use it, let’s say, as an anti-aging cream. What I have done lately is to put it on my nose, to see if it reduces the appearance of pores, and on my neckline, because it is very oily and impurities form. I’ve noticed a great improvement in my neckline, not that much on my nose.
In Mexico Retin-A is sold without a prescription, but in Spain, Retirides must be prescribed by a dermatologist. However, Retirides is sold in Andorra without a prescription, so one can go there or maybe buy it online. In the United States, you can find it as Retinoid.
So now you know, if you decide to try this pseudo-Roacutàn, use it with caution!
Until next post!!!
*To buy the products I speak about (I only recommend products that I’ve tested):
As an Amazon Associate I earn from qualifying purchases
In this month’s post I’m going to talk about my new discovery for (facial) skin care. Well it’s not really a discovery because I have been using aloe vera on my face for many years, but now I have switched to real pure aloe vera, straight from the plant. A few years ago, my mother bought an aloe vera plant and we had it on the windowsill in the bathroom. I tried to cut a stalk (leaf) and put the gel on, what was left over we kept in a glass in the fridge. The problem with this method is that there is a lot of gel left over and the gel spoils in a couple of days, even if it is in the fridge. That is why commercial gels, no matter how organic and pure they may be, carry some preservatives (like all cosmetics). Not that this is wrong, but of course I think that if aloe is only aloe, then much better.
That plant died and I did not try the natural method again. Also of course it is much more practical to have the aloe in a container that you take anywhere, put it on and that’s it. For years I used one from the Canary Islands that had very few ingredients, it was called Aloveria. I liked it a lot but they stopped selling it in El Corte Inglés and I didn’t want to spend more to buy it directly from the company, because of the shipping costs. With that and with the proliferation of eco stores and online commerce, I began to buy other brands of aloe on the Internet. I didn’t like them as much as Aloveria but they were organic brands, with pure aloe as the first ingredient, and they were cheap. My skin always felt somehow tight when I put aloe on, I thought it was normal because I had read that aloe, although it hydrates a lot, creates an effect like when you put a facial mask on the skin and it dries. What started to bother me is when I noticed that my skin was peeling a little. This happened with an Italian brand of aloe that I bought online and … surprise! Looking carefully at the ingredients list, I saw that it contained alcohol. I could not believe that I, who supposedly already knew all the tricks of the cosmetic industry, had fallen into that error. All for believing that since it was sold in an organic store it would be very pure and such. So I switched to another (made sure it didn’t have alcohol or too many ingredients). But I was wrong again. It turns out that one day reading a blog I found that now there are pages so that one can see what are the ingredients in cosmetics, for all the controversy that has been going on about lead on lipsticks, carcinogenic ingredients and endocrine disruptors etc. The page that I used is called cosdna.com. I put the ingredients in my new aloe vera gel and it turned out that it contained polymers (a petroleum derivative) and sodium hydroxide. I already talked about sodium hydroxide in another post. It is an irritating and very drying ingredient. Although it is widely used in natural cosmetics, especially to make soaps and shampoos, I think a soap that you rinse is not the same as a gel you put on your skin to absorb it. After investigating I saw that it is precisely something that irritates the skin of many people. So that encouraged me to try the natural method again.
I bought an aloe vera plant for 4 euros in a greenhouse, with its pot included. The aloe vera plant is very easy to care for, you only need to water it once a week and keep it at a warm temperature, tending to hot (between 15-25 degrees). In winter it can simply be kept indoors in an illuminated place, and in summer on a window ledge. It is not recommended to leave aloe in direct sunlight (at least not all day), so that the leaves do not get “burn”.
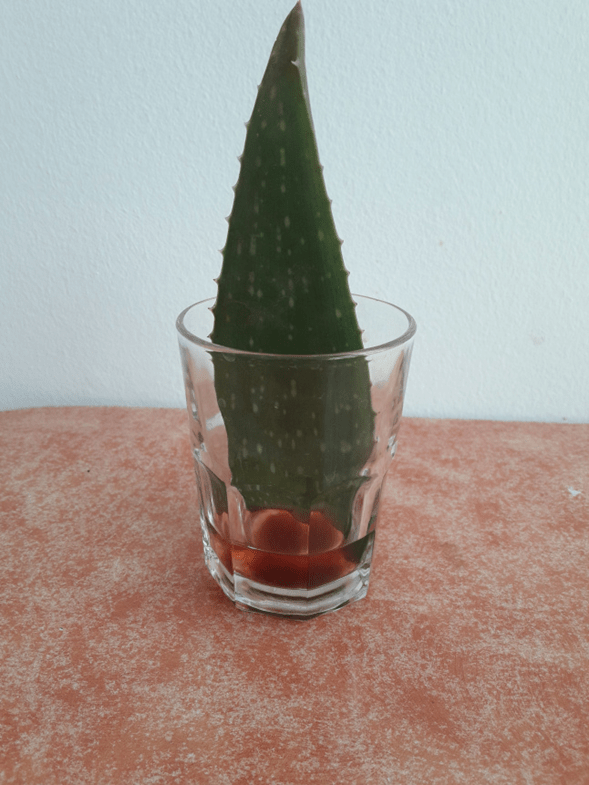
To use aloe vera, what you do is to cut a stalk that is on the outside. That stalk will then grow on its own. You clean any mud and put in a glass with some water on the part where the aloe gel is visible. This is to release the aloin, a kind of iodine that the plant has and that can be irritating. I left the leaf 24 hours and this was the water’s appearance:
The next step is to peel the leaf, making two cuts on the sides and opening it. The gel is removed and, at this time, what can be done is to put it directly in an ice bucket or to liquefy it with a hand rod mixer (and then you distribute the liquid aloe in the ice bucket)(don’t use any water!). If you choose the liquefy method, aloe vera lasts more, since you’re using all the aloe. If you don’t liquefy it you’re just using the liquid on the surface of the aloe pulp. Besides, if you don’t liquefy it, take into account that the aloe vera pulp is a bit messy to handle, it feels like snail drool.
Once the aloe pulp or liquid has been distributed in the ice bucket, it is put in the freezer and in a few hours the aloe cubes can be removed into a Ziploc bag. What I do is to take an ice cube out and put it in a small glass (one of those for shots) and I leave the small glass in the fridge. There the ice cube thaws, and I already have a dose of cold aloe vera, which lasts for about two or three days in pulp, and more if it was previously liquefied. I apply it twice a day, morning and night).
What I have noticed with this new method is that my skin is no longer dry, tight or peeling. You only notice some tightness in the first seconds of putting it on. It seems wonderful to me and it does not involve so much work, in addition to being cheaper than buying commercial aloe gel. The only difficulty I see is when it comes to traveling, for trips of more than 3 days and without access to a refrigerator. If not, just pop a cube or two in an empty cream container and you’re done.
I hope you like this information !! Until the next post!
*To buy the products I speak about (I only recommend products that I’ve tested):
As an Amazon Associate I earn from qualifying purchases
In this month’s post I will continue along the same lines as the previous one, talking about hair discoveries. Given my intention to reduce industrial cosmetics to the maximum or eliminate them completely (news about toxic ingredients in lipstick are nothing new) and my success in covering gray hair with henna, is no wonder I’m not satisfied with just using any supermarket shampoo/conditioner/mask products. Also, since I like to be as minimalist as possible, I have been searching for the simplest formula for months.
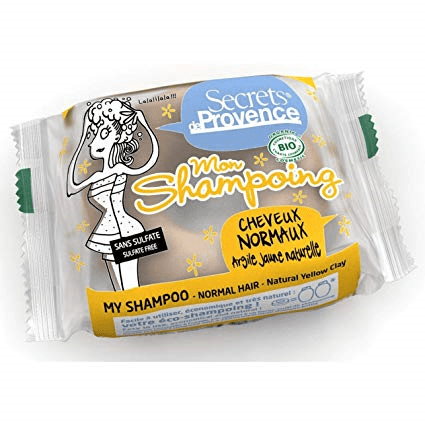
Well, I had heard about solid shampoos and about how convenient they are when travelling, but I had not tried them. For a long time I used the traditional yellow Johnson & Johnson (baby shampoo), because shampoos for babies’ ingredients contain less “shit” (although there have also been alarms for toxic ingredients in this type of shampoo). So, I started to look at solid shampoos and I think I have found the one that suits me very well, lasts a long time (another advantage of solid shampoos is that, since they are not diluted in water, they yield more) and it is decently priced for its duration. The shampoo I like is this one:
I also bought the container to put the donut-shape shampoo, and in the shower I simply leave it resting on the soap holder, because the hook that came with the shampoo doesn’t work. The ingredients of this shampoo are:
This shampoo also has versions for greasy, colored, children hair… but its composition does not vary much. I had tried another one that contained the typical caustic soda/sodium hydroxide that grandmothers’ shampoos/soaps used to have and that is still used a lot for homemade cosmetics today, but with that ingredient my hair looked too dull. As I dye my hair with henna, it is normal for my hair to get a little dull in the first wash after dyeing because there is still some mud residue, but by the second wash it is already perfect. And what I do after washing my hair and having it with a towel for 5 minutes is to spray it with white vinegar. Vinegar works as a conditioner for your hair (and for clothes in the washing machine, as well as cleaning the whole house along with baking soda). I use regular white vinegar because it is much cheaper than apple vinegar, and the effect is the same. Don’t worry about the smell because it goes away when your hair dries. And that is all, my friends! Henna, solid shampoo bar and vinegar, the 3 products I use for hair. Very cheap, ecological and non-toxic.
I am not going to dwell too much on the dangers of industrial shampoos, as there are already thousands of articles and blog entries that explain the harmfulness of parabens (endocrine disruptors), silicones (they damage hair) and sulfates (they cause dye to last less and they spoil hair). In addition to that, with industrial shampoos hair lasts clean much less time. The transition from industrial shampoos to natural shampoos can be a bit difficult (we seem to be doing better with industrial shampoos), but it takes a few washes. I do not usually use hair masks, but if I want to use it, I would simply put coconut oil before washing my hair and that’s it. And aloe vera gel works very well as hair gel, although I don’t use it either.
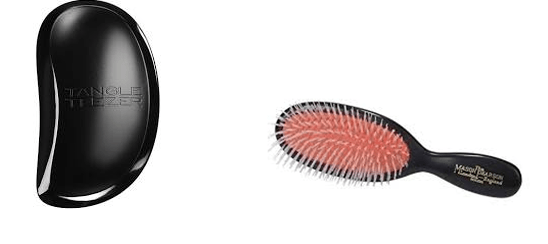
My hair is thick and strong, and although it may seem like an advantage, it is also complicated to deal with. Except when I straighten it, I do not brush my hair every day, only when I’m going to brush it (that is, every 4 or 5 days). And I need a good detangling hairbrush, especially after applying henna. I have looked for hairbrushes that would help me detangle my hair easily, and the two best I have found are these:
The Tangle Teezer hairbrush detangles very well and is made of plastic, so it is easy to clean in the dishwasher. It detangles very well, you can use it also in the shower with your conditioner (or vinegar). I also bought the Mason Pearson hairbrush because I saw a Victoria’s Secret model recommending it 😊. It has surprised me because it is indeed very good. Since I already had the Tangle Teezer, I bought it in the bag version to carry in my bag (it’s cheaper that way) and I love it. I have it in blue and with nylon bristles (white ones, for thick hair). If your hair is medium (neither very thick nor very fine) there is a version with nylon and boar bristles, and if your hair is very fine with only boar bristles (the dark ones). I already had a boar bristle wood hairbrush, so I bought the nylon one.
For frizz (it happens in humid places and after drying my hair) I sometimes use a wooden comb. It is also good to roll your hair with a microfiber towel or a cotton shirt Anyway, the best thing for frizz is to iron your hair a little.
Finally, speaking of showering, I wanted to take the opportunity to point out that it is not necessary to lather the whole body every time we shower, and less with industrial soaps, because it causes too much dryness. I use the same soap for my body as for the face (Dr.Bronner’s) or a baby one (Mustela). I only use soap daily for my private parts armpits and feet. For the rest of the body, soaping it once a week is more than enough. This way the skin does not dry out so much and you do not need moisturizer after the shower. By the way, the best body creams, in my opinion, are coconut oil and shea butter.
Until next month!!
*To buy the products I speak about (I only recommend products that I’ve tested):
As an Amazon Associate I earn from qualifying purchases
This month’s post is going to be a compilation of everything I’ve been writing about on the blog, since I started with three posts in 2015, until I decided to take it more seriously and write a monthly post as part of my goals for the year in 2017.
When I started the blog I wanted to share things that I had discovered by myself, especially through the Internet and from my own experience and that of others, over the years. They were doubts, questions that do not appear so much in beauty magazines and on blogs and YouTube channels, or that in the case of appearing I considered they had wrong or incomplete answers (such as taking the pill if you have acne or resorting to laser if you have hair on your face…). I really wanted to address problems and solutions that I thought were not being publicized enough.
In 2015 I explained how the irrigator (in its eco-friendly and cheap version, the Italian So-Wash) is the secret weapon that dentists do not want you to discover, along with the coconut oil + bicarbonate toothpaste. A toothpaste that also works as a deodorant. I also published the most visited and consulted entry of the entire blog, the one that talks about electrolysis hair removal. A post that I updated later showing the progress of my “do it yourself” results in this regard.
In 2017, I started talking about my experience with hirsutism and acne, I defended Roacutan and Ovusitol against the contraceptive pill and I talked about some simple and cheap measures like aloe vera, castile soap (Dr. Bronners), the importance of changing face towels and the pillowcase (better if it is made of silk) often. I have also talked about the importance of nutrition (the now fashionable smoothies) for the skin and the little-known mineral makeup.
I also talked about health issues, such as period pain, and how I try to control them by always keeping omeprazole and ibuprofen close at hand, in my emergency bag. Or the problem of belonephobia, so poorly treated by most health professionals and which causes serious trauma to many people. I still hadn’t found a definitive solution to this issue, but reading the book Overcoming Medical Phobias gave me some hope. Trying psychological treatments (hypnosis, neurolinguistic programming) gradual exposure (with images, videos…) and using the applied tension of the muscles could be the key. In my case, I also think that choosing a different site from which to draw the blood (perhaps the hand and not the inside of the elbow) could have an influence. I’ve been working on this for the past few months, and I’ve gone from feeling a bit dizzy just reading or watching videos about it, to being able to tolerate it (at least from a distance). I also think that the time of day influences, since for example I have the lowest blood pressure and I am weaker in the morning, which is precisely when the blood extraction procedure is done (and on an empty stomach). A reader advised me to use Buzzy and I have it ready to try in the future. What I’d really like to try though is the Seventh Sense Biosystems TAP. I keep writing them to see how to acquire it but it seems that at the moment only certain laboratories have it (I have also written to them and they do not respond). I hope it is only a matter of time, because it gives me the impression that there may be the solution. Other alternatives are the use of Vacutainer or butterfly needles for extractions. I had considered these alternatives, so I would also like to try. Anyway, hopefully in the future I can write a post explaining how I finally solved the issue. It would be my personal big hit on these issues, along with the discovery of electrolysis :))
Some posts include novel therapies, such as the natural solution to myopia (including much cheaper glasses), a problem that I had previously discussed. In this regard, I recently read a piece of news about some drops to solve myopia developed by a university in Israel … I’ll be watching too. Hopefully ending myopia without surgery will my third hit :))
*To buy the products I speak about (I only recommend products that I’ve tested):
As an Amazon Associate I earn from qualifying purchases
In this month’s post I am going to talk about mineral makeup. I have already spoken about issues related to the skin, such as acne, how to prevent it with hygiene and nutrition measures, how I clean and hydrate my skin … But I realized that I had not talked about makeup, so let’s go.
I don’t use makeup every day, I just use a bit of blush and Burt’s Bees lipbalm or a very soft lipstick from Ere Pérez. I don’t like having paint on my face every day, and since my skin looks good, I don’t think I need it either. I do not paint my eyes because I wear glasses or contact lenses and I do not think it is good for the eye to wear mascara or eyeliner daily. As I have quite long and black eyelashes, I think I can do without it. That said, I understand that some people, because of their profession, out of habit, out of insecurity or to avoid comparative injury, put on makeup every day. I am not going to enter into evaluations of whether it is part of the slavery-of-beauty-if-you-are-not-pretty-you’re-not-valuable to which women and not men are subjected (although I think so). But I want to emphasize that, especially fo those who have acne, putting on makeup to cover it only makes it worse. Also, a fact: the makeup and cosmetics industry is one of the most profitable industries in the world. That’s curious considering that makeup and cosmetics are not basic/unavoidable necessities (as are having a house, eating or dressing).
Well, getting to the point, especially if you are someone who puts on makeup on a daily basis, you should look at the quality of what you put on your face. As in the case of creams or industrialized food, do you understand the list of ingredients of the product? Surely not. And makeup also passes into the bloodstream, in addition to the fact that if it is not hypoallergenic or non-comedogenic it can cause, respectively, allergies or blackheads. And even if it is, the fact is that makeup (especially foundation) clogs the pores and does not let the skin breathe. Eye makeup can cause irritation and conjunctivitis. And about lipstick (aside from charges of containing lead), it turns out we “swallow” a large part of it.
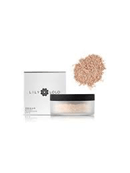
When I was a teenager and I had acne, I was recommended to use the Avène brand as a foundation and bronzing powder. I have done very well with it, but recently I discovered mineral makeup and I think it is an even better option, because it only has mineral pigments as ingredients. This type of makeup does not have any strange ingredients (in fact the list of ingredients is very short), allows the skin to breathe and usually comes with some sun protection (I already talked about the sun in this post). As with many of the products that interest me, they are not readily available in department stores or perfumeries, but rather in herbalists and organic stores. BUT: the good news is that they can be purchased online. The bad news it is better to try on makeup first buying it, to see if the tone suits us. For this, some brands (like the one I bought, which is called Lyly & Lolo) have mini-containers at a low price so that you can try a sample of different colors before deciding which one to buy. For lipstick and mascara, I use Ere Pérez or Belcils, and these brands also have their offers. The good brands I’ve found are: Bare Minerals (United States), Lyly&Lolo (United Kingdom) and Mineralíssima (The Netherlands). I use the foundation and bronzer from Lyly Lolo (foundation “In the Buff”, with 15 SPF, and bronzer “South Beach”).
The only thing I don’t like about mineral makeup is that foundation is in a powder format (there are some fluids, but their ingredient list is not so “pure” anymore). A powder format means applying it with a brush, and although the result looks good, I prefer that the foundation blends with the skin. With this, the result looks slightly powderier. But the truth is that it spreads well, with very little amount you cover your whole face. In addition, the container is very practical because it has a closure that only opens partially, with a few holes, to apply a very small amount. I do it directly on the lid of the container and from there I pass it to the brush.
I hope it helps you and that you try it! :))
*To buy the products I speak about (I only recommend products that I’ve tested):
As an Amazon Associate I earn from qualifying purchases
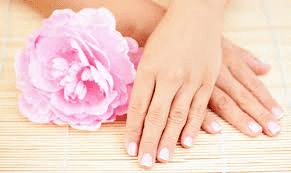
It is said that the hands reveal the age of a person: a lady may have put botox, acid, vitamins and things like that on her face, have a facelift … and even tough the appearance of her face is that of someone younger, her hands provide a clue about her true age. This is because hands don’t receive much attention and, even when they do, it is difficult to make hands “appear younger” than their age (however, I have heard that infiltrations exist also for hands).
Hands have hardly any fat or collagen, so the aged appearance is noticeable earlier. Older people often have brown spots on their hands, just as on the face. These spots, as I said in a previous post, can be removed with the electric hair removal machine (although I suppose there will also be laser methods).
Although the advice that I am going to give seems quite obvious, I want to remember some things here precisely because I see many people who do not follow them every day:
1. Protect your hands from cold weather. Especially in winter months, never forget your gloves! Cold weather causes hands to become dry, scaly and rough.
2. Protect your hands from the sun. I already explained previously that I am not in favor of applying sunscreen every day, that this type of recommendation seems to me somewhat interested from people who want to sell creams (in addition to many other issues regarding their ingredients). My advice is to walk in the shade and to be protected with an umbrella, which also works for the rain. Besides, I use hats! I leave sunscreen only for situations in which I am going to be directly exposed to the sun for a long time (beach, swimming pool …). If we use umbrellas hands are already protected in the shade. But if your hands are going to be exposed to the sun, remember to also put sunscreen on your hands.
3. Use gloves for housework. It horrifies me when I see people washing dishes without gloves, exposing their hands to hot water and the chemicals in dish soap (it is better if you have a dishwasher, it saves water and involves less work for you). The same when we clean the house or wash clothes by hand. I have a hairdresser friend with shattered hands, because of course, she spends the day washing heads … in this case I don’t know if there will be any type of suitable gloves for it, but it would be recommended.
4. Hydrate your hands. Just as you wash your face and moisturize it at night, do the same with your hands. We wash and dry our hands several times a day, so they need extra hydration. Coconut oil is good for it. If you prefer creams (I am quite anti-creams), one that seems awesome to me is Neutrogena. Or you can just put petroleum jelly (although petroleum jelly is derived from petroleum and I’m a bit anti-it too).
5. Wash your hands! Well, this no longer applies to hand care but we all know that it is a basic hygiene measure: wash your hands before eating, cooking, after going to the bathroom, changing diapers or playing with the dog … Outside home it is always better, if we have the option, to dry our hands with paper than with hot air (it dries out the hands). And if it is not so easy to find a sink, antibacterial gels are a good option, they do not need rinsing and can be carried in your bag. And another tip that may also seem obvious but it is not so obvious: you have to wash your hands before washing your face or applying moisturizer or makeup. That is, our hands are clean when we put the soap with which we are going to wash our face, moisturizer or makeup. UPDATE!!: This post was written long before Covid-19, but this last recommendation seems more useful than ever.
*To buy the products I speak about (I only recommend products that I’ve tested):
As an Amazon Associate I earn from qualifying purchases